
FastAPI is the interface that you use to connect to your database, in our case MongoDB, to create, read, update and delete (CRUD) each instance of an object that you save to your database. MongoDB calls these documents.
To begin this process make sure that you have set up your free account with MongoDB. They do a good job at guiding you through the process but roughly, the steps are:
- Sign up and create an “organisation”
- Create a project (and assign yourself as owner)
- Deploy a database (M0 is the free version)
- Add authentication using username and password
- Specifiy where you’d like to connect from (use 0.0.0.0/0 to access from anywhere. This can be changed later).
- Voilá you can now go to your database (which is empty for now).
The default method of connection to your database is through using your current IP address. However, if for some reason you are disconnected from this IP address (you disconnect from your the internet) then the connection will stop working because I new IP address will be assigned to your connection. 0.0.0.0/0 prevents that from happening.
It helps to remember the hierarchy of MongoDB data:
- You created an “organisation”
- That organisation can have one user (you) or many others
- The organisation can also have projects. We created one called “Plantopia” and assigned ourselves as the only user with admin privileges.
- Plantopia has a database.
- That database will have collections (which we haven’t created yet)
Setting up FastAPI routes
Make sure that you are in your project working directory and that the virtual env is activated.
The CRUD processes described above are enacted via so-called routes. At the root level of your local development folder create a new file: main.py with the following code.
1
2
3
4
5
6
7
8
9
10
11
12
13
14
15
16
17
18
from fastapi import FastAPI
import uvicorn

app = FastAPI()

@app.get("/", tags=["root"])
def root():
    return "Welcome to Plantopia"

if __name__ == "__main__":
    uvicorn.run(reload=True, app="main:app")

#(4) FastAPI() is made into alias “app” and will function as a decorator to
#    routes you declare as functions.
#(5) This is a route of method get, which is access using the root url.
#    The use of “tags” here will become evident later.
#(7) Defines what the root “does”.
#(10) makes a shortcut to launch the app using “python3 main.py”
Launch the app by typing python3 main.py and you should expect to get a response in your terminal that looks like this:
1
2
3
4
5
6
7
(.venv) ➜  plantopia python3 main.py
INFO:     Will watch for changes in these directories: ['/Users/you/Development/my_projects/plantopia']
INFO:     Uvicorn running on http://127.0.0.1:8000 (Press CTRL+C to quit)
INFO:     Started reloader process [25691] using StatReload
INFO:     Started server process [25693]
INFO:     Waiting for application startup.
INFO:     Application startup complete.
Meaning that the app is now visible on this address in your browser: http://127.0.0.1:8000 and “Welcome to Plantopia” displayed in your browswer window. We’ve created our first route, which does nothing other than to confirm that we are connected. Let’s set up one route each to be able to create, read, update, and delete users to our database.
At this point, most tutorials will add all the routes to this file. This is the clearest way of seeing the implementation and fastest way to write it. However, all real-world APIs are complex enough that putting everything in one file creates an unmanageable amount of code to navigate. So I will be controversial and ask you to start separating your functionality into distinct folders and import them as necessary.
Folder setup
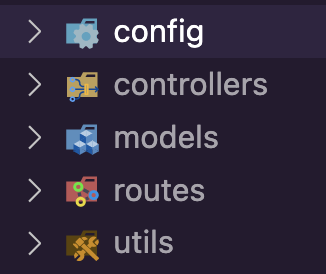
To your root directory add five folders: config, controllers, models, routes,utilities. You can call these folders anything you want, but the names I have chosen are used often enough by others that it you should become familiar with the terminology. This is how we will use them:
- Config: will keep a file with the connection to MongoDB
- Controllers: will keep the functionality that we want to add to each route
- Models: will house the template/boilerplate for the data stored in each document in the database and python classes used to display data.
- routes: will include the CRUD routes
- utilities: will store all the functions that are not specific to a route but may be used more than once across the app.
Let’s set up the routes for interacting with any “user” data in the database.
User routes
Navigate to the routes folder you just created and in that folder createa a file: user_routes.py and copy the following code:
1
2
3
4
5
6
7
8
9
10
11
12
13
14
15
16
17
18
19
20
21
22
23
24
25
26
27
28
29
30
31
32
33
34
35
36
37

"""
Verified user routes
"""

from fastapi import APIRouter

user_router = APIRouter()


# Create
@user_router.post("/create")
async def add_user_to_db():
    """ Add a new user to the database """
    pass


# Read
@user_router.get("/me")
async def read_user_data():
    """ Get current user data """
    pass


# Update
@user_router.patch("/me/update")
async def update_user_data():
    """Update current user data"""
    pass


# Delete
@user_router.delete("/me/delete")
async def delete_user_data():
    """Delete current user"""
    pass
We have created the routes but the main.py file is the one that is in charge of deploying them, so they have to be imported there. Go to that file and under import uvicorn insert: from routes.user_routes import user_router and after the first route add: app.include_router(user_router, prefix="/users", tags=[users]). Your main.py file should now look like this:
1
2
3
4
5
6
7
8
9
10
11
12
13
14
15
16
17
18
19
from fastapi import FastAPI
import uvicorn

from routes.user_routes import user_router

app = FastAPI()

@app.get("/", tags=["root"])
def root():
    return "Welcome to Plantopia"

app.include_router(user_router, prefix="/users", tags=["users"])

if __name__ == "__main__":
    uvicorn.run(reload=True, app="main:app")

# (4) when you create routers for plants you will add it under this import
# (12) you will include other routers (plants) under this line.
That is it! We have added CRUD routes to our API. But how can we verify?
OpenAPI and Documentation
FastAPI comes out of the box with a neat interface for testing your routes. In reality, this is a feature that will help you write your documentation, but for our purposes, it will help us manage and test our features.
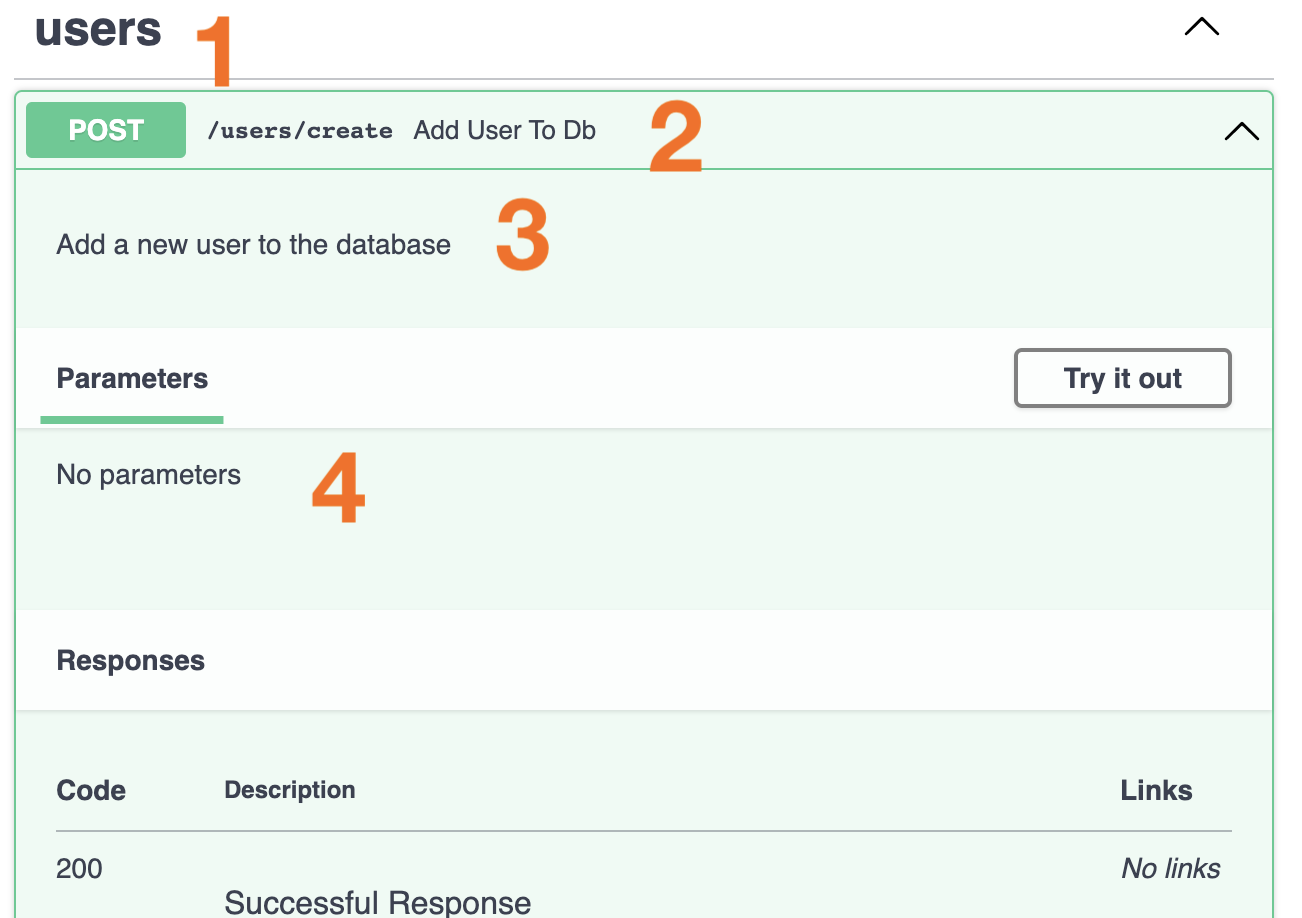
If you navigate to http://127.0.0.1:8000/docs, you should see this:

If you click on each one of these, you’ll have the option to test the route and can even pass parameters. For the time being, nothing will happen because we haven’t added any funtionality yet, but you can appreciate how helpful this feature is.
 Remember how in the routes inside our
 main.py file we have parameters “tags=[“users”] and “tags=[“root”]? These are what keeps our routes neatly grouped together and labeled thus in this url (see 1).
Notice also how FastAPI has taken the name of the functions used in user_routes.py and added them as labels to the routes in the webpage (see 2).
Where we used docstrings, they have been added too (see 3). And queries and parameters will also be added as needed (4).
Conclusion
We have created a new API with routes for users and set up our folder structure in order to keep things organised as we increase in complexity. Your files structures should look like this:
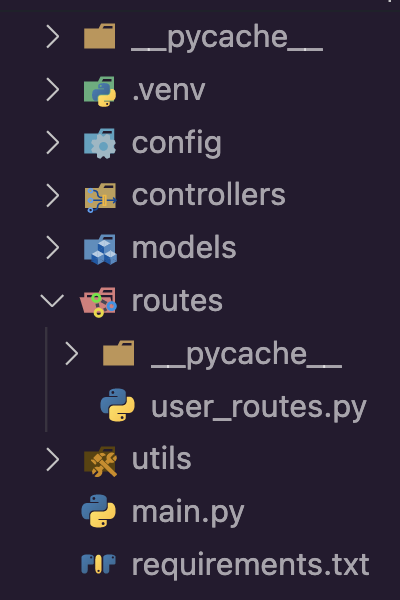
In the next tutorial, I will connect the routes MongoDB and start creating the models for the data.